
While Electrical designers are more than comfortable working together on drawings in SOLIDWORKS Electrical Schematic, they may feel a bit like a fish out of water when pushing their designs into Electrical 3D. It often falls on the Mechanical designers or MCAD team to put the assembly together in 3D with the placement of various Electrical components.
However, sometimes it makes sense for the Electrical team, who have more intimate knowledge of the design, to place their components in the 3D space. Here, it helps to have a few tricks up your sleeve to make component placement go smoothly, starting with setting your parts up with Mates so they easily lock into place in the project assembly!
Use Smart Mates to Your Advantage
Placing parts in your project can come down to inserting the parts, then moving them with simple mouse gestures. Or we can add mates to the parts after placement. While mates can be handled on the fly, for parts that will be used often, it makes sense to set those parts up with smart mates.
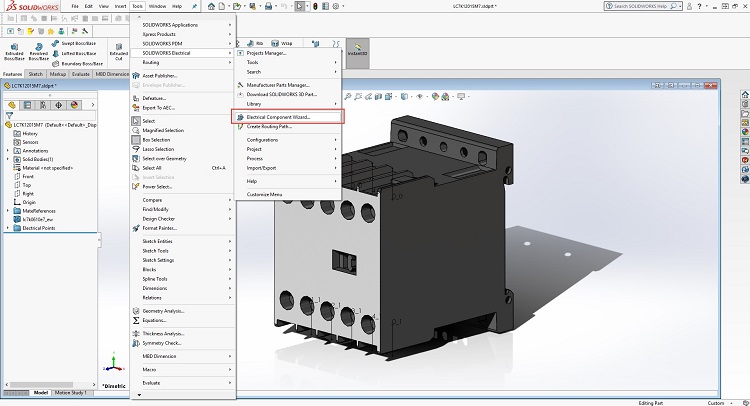
To make this process easier, the Electrical 3D add-in has a Wizard so even a SOLIDWORKS novice can use the Electrical Component Wizard.
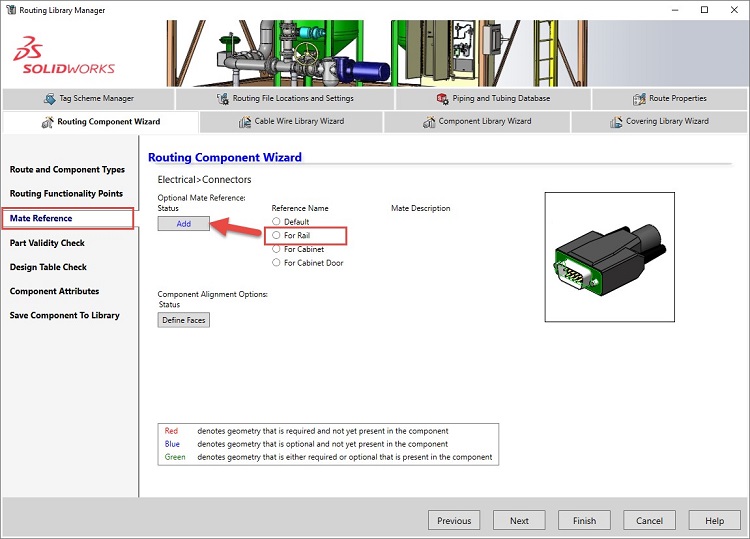
Go to Mate References and simply pick the faces of the part that will mount on a rail or punch through a door.
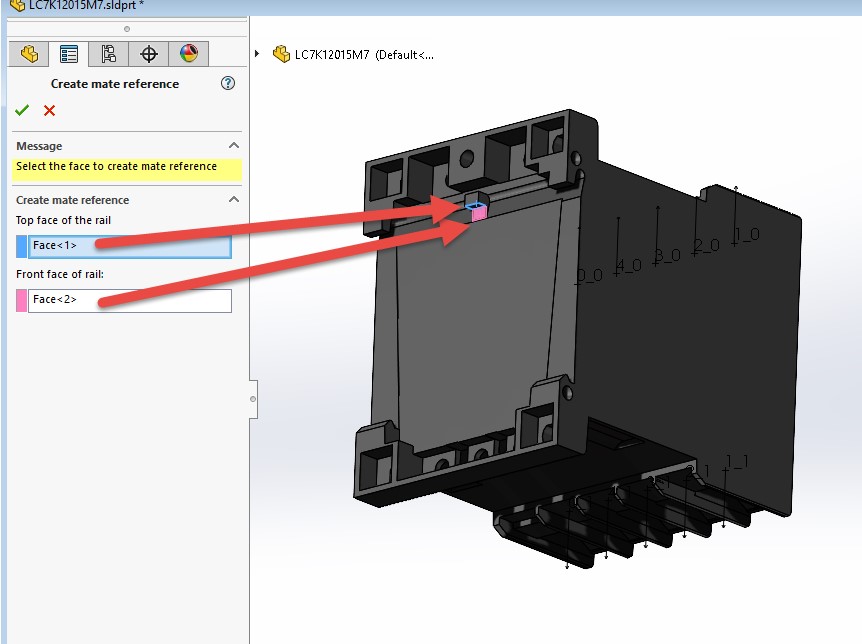
Just follow the prompts, pick your faces, and save the part!
Plug & Socket, Wire Terminations, Ring Terminals
For other types of parts like connectors (think plug and socket, or wire terminations like ferrule, tab, or ring terminals) it becomes time consuming and tedious to place these components in a project and get them to line up properly either by moving manually or setting up mates.
For these style parts, we can set up mate references in advance so the parts lock together upon placement. Not only does this make the project assembly easier to create, but setting up these mates is simple enough that an ECAD user can take that workload if the MCAD team is swamped.
The mates can be set up by again going to the Electrical Component Wizard and choosing the “default” option in the Mates References section. However, this is merely a shortcut to the standard SOLIDWORKS Mate References tool, so using this Component Wizard option is unnecessary and it checks out an Electrical 3D license.
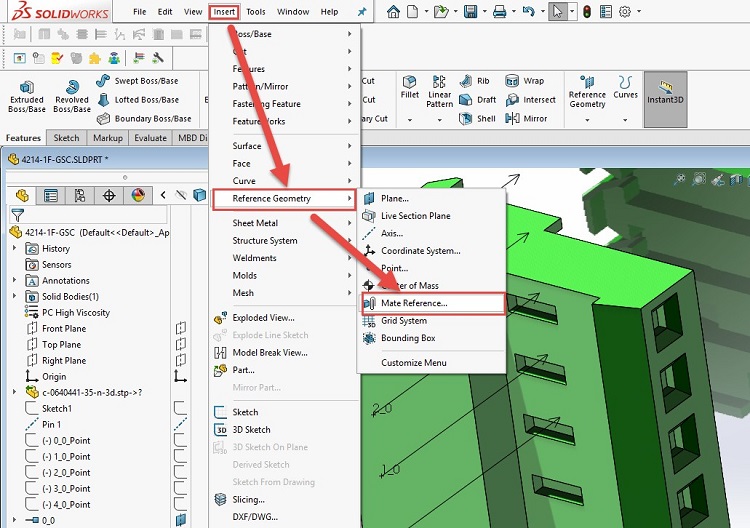
So to keep that license in the pool, we can instead go to Insert>Reference Geometry>Mate References.
In the Mate References manager, we can choose 3 different faces or features on our 3D parts and set the style of mate that will default when it is placed near.
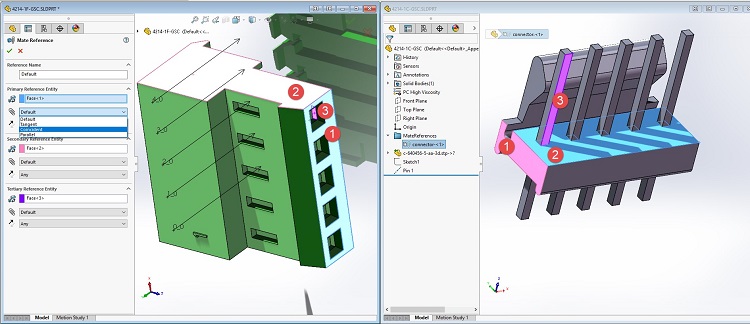
Thinking through the part pair we can set up the mates so the faces or circular features line up upon placement.
Another “best practices” possibility is to use the base front, right, and top planes, or for those are not consistent on the part pair, add planes in the part centered on key geometry. These planes then can be set with coincident Mate References.
Whichever method works best for the parts, save the parts (check in if needed) and test them in a mini assembly by placing them and see if the mates align as expected, watch out for reverse plane orientation or underdefined mates, correct your Mate References, and then watch your next project come together quicker than ever.
For a deeper dive on smart mates, visit these classic methods!
Contact Us
Did you like this tutorial? There’s more where this comes from. Find other blogs covering SOLIDWORKS Electrical by Evan or more on our YouTube Tech Tip videos.
Have a question? We’re always available to talk over the phone, for you to leave a message, or for you to submit a request – just contact us.
Share
Meet the Author
view all posts by Evan Stanek
SOLIDWORKS Webinars & Power Hours
