What Are PDM Templates?
Creating and using templates in SOLIDWORKS PDM Professional is a great time-saving tool to quickly set up new folder structures and files while streamlining repetitive and common projects. PDM is a fantastic tool for organizing your data. The SOLIDWORKS PDM development team makes the software customizable, so you can efficiently structure new projects, reduce the number of manual clicks needed, and automate the folder and file creation in SOLIDWORKS PDM. Let’s take a look at how to create PDM templates:
Step 1: Plan your folder/file structure
First, you’ll want to plan your folder/ file structure. This can be written down, or if you already have one you have noticed you are repeatedly making, that is perfect. Now open the PDM administration tool, right-click on the Templates node, and select New Template.

The first page will include the menu items you want your users to see when they right-click. In the example below, the user must hover over Templates to access the SOLIDWORKS Part template.


Step 2: Execute as
When creating new folders and files, the Execute as tab will be utilized to specify the user credentials. This user will need the proper state and folder permissions to create the files, including the read permissions of any file templates used.
Step 3: Template Cards
The Template Cards tab is just as important as having the actual template card made. Let’s take a step back and make one. Click OK, head up to the Cards node, right-click Template Cards, and select New Card.
Here you can utilize the card editor to make a new card. The template card grabs information for the files and folders from the user. Although this step can be skipped, the purpose is to help keep the templates organized.

I opened the SOLIDWORKS Part FILE card and only kept the variables I wanted the user to fill out when the template is created . When the template is created, it will be linked to the template variables and copied back to the folder data card and the folder and file names. Then, after changing the Card type to Template card and saving the page, we have a template card that we can utilize in our template.
***Note: You don’t have to have a template card; it’s just nice to keep your data organized.
Now back to editing the template. In the template cards tab, add the template card to the selected cards.
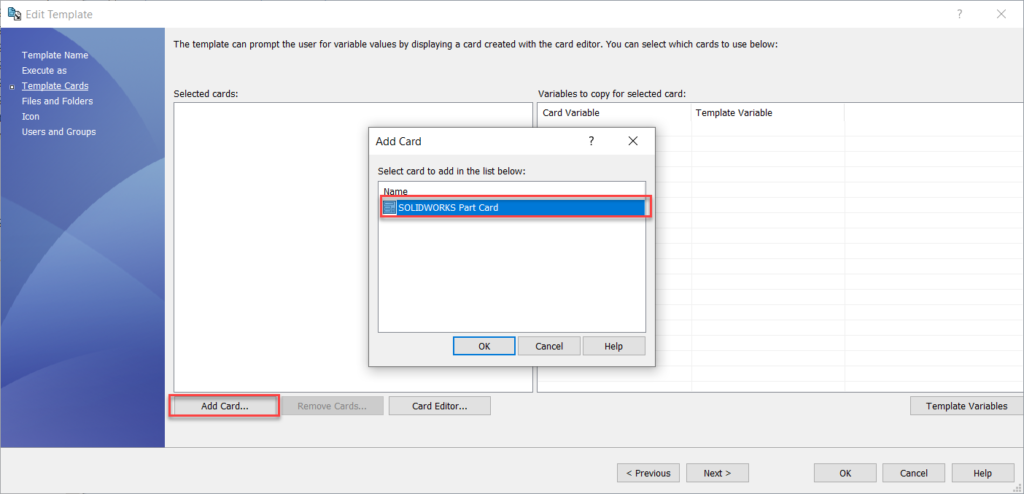
Once added, the Card variable column will populate, allowing you to create template variables.
Select Template Variables. This will be where you’ll make new template variables which can be done in the File and Folders tab if you choose not to use a template card.

You need to be able to differentiate the template variables from the regular PDM variables. The most common way to distinguish is by adding an identifier like t_ in front of the variable’s name. These template variables are used to pass information between the template card and other various PDM attributes with the files and folders that you are making with this PDM template.
The type of variable you select depends on what kind of information you want to be pulled into the files and folders. If the template variable pulls information from the template card, the type can be set to Format string. Alternatively, to a template card, you can specify that a template variable prompts the users for the variable value.

Step 4: Files and Folders
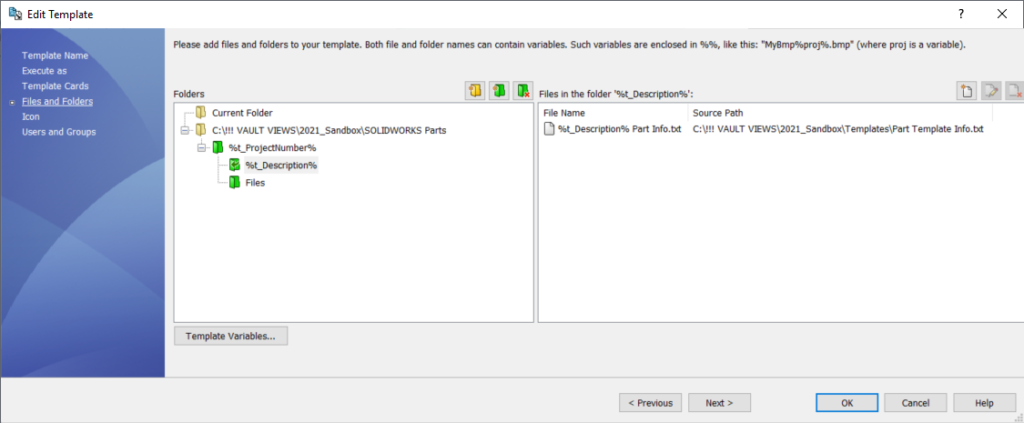
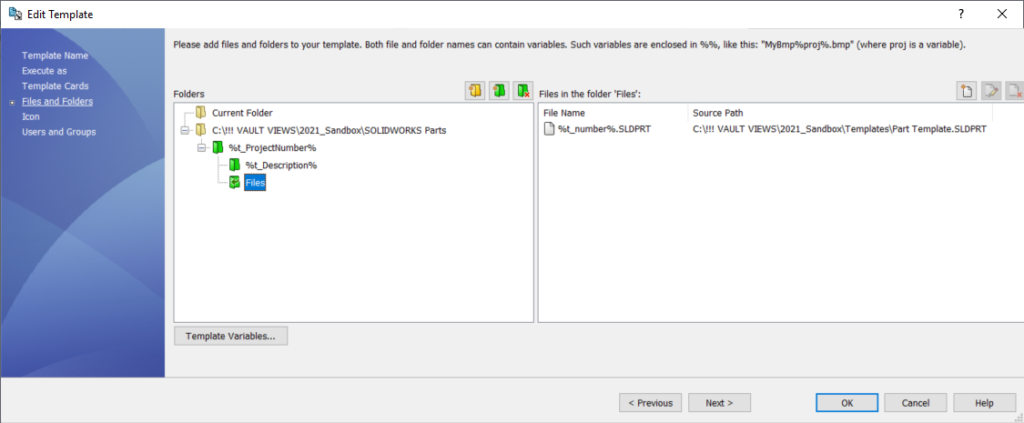
The Files and Folders tab is where you’ll add your folder structure. When you build a template, it will always go to the SOLIDWORKS Parts folder defined below, regardless of where you are in the vault. I’ve even related the folder names to the template variables by placing a percent sign before and after the template variable to pull this information.

When you right-click> properties on any of the folders/files, you’ll see a pop-up. You can assign permissions and copy variables from the template variables to the card variable.

The %t_Description% folder copies a .txt file in a separate folder (its source folder), and the description will be a part of its name. The files folder has a SOLIDWORKS part file with the file name being the previously defined template variable value.
Step 5: Icon
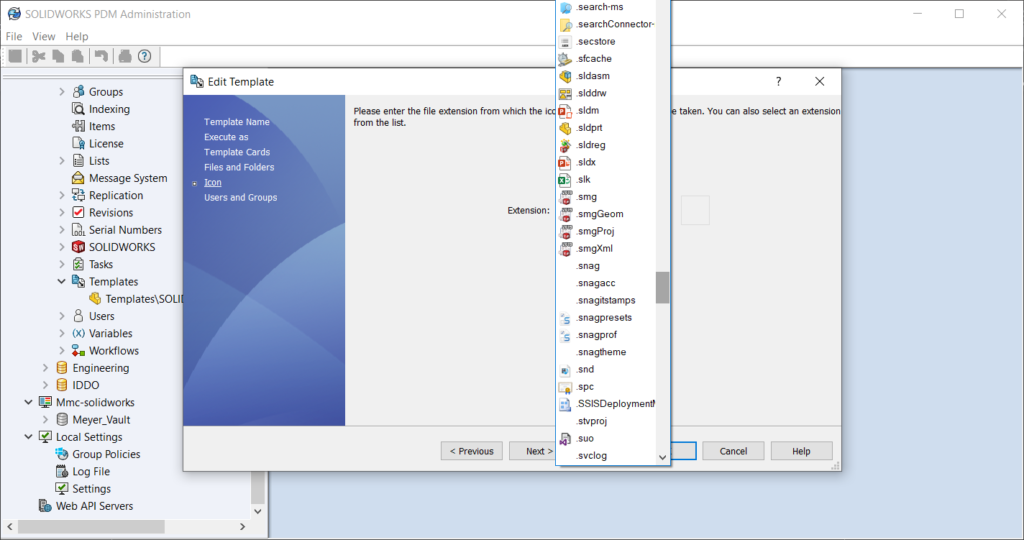
The icon tab allows you to select an icon you want to see next to the template name when you use the template.
Step 6: Permissions (Users and Groups)
The permissions (user and groups tab) were briefly discussed when we went through the Execute as tab. This is different since this will be who is allowed to use the template. If you have access to the template but don’t have permission to access the source files, you will not be able to make this template which is why they have the execute as tab. Click ok, and you now have a template ready to be used in your workflow to make new file structures!

Contact Us
Have a question? We’re always available to talk over the phone at 262-790-1080; for you to leave a message or submit a request – just contact us. Looking for technical support?
Submit a support case online.
Want More?
Share
Meet the Author

