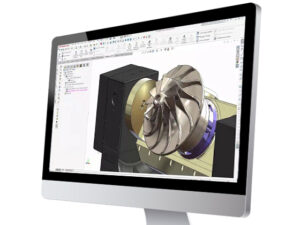
Materialise Magics, the premier STL repairing and processing software in the Additive Manufacturing (AM) industry, is like the Costco of AM software: if you need it, you can probably find it in Magics. This powerful tool allows users to perform complicated STL operations with ease, such as booleans, lattices, and perforations.
STL Modifying Made Easy
This might not seem like too big of a deal at first, but ask anyone who has attempted to edit STLs in solid modeling softwares, and you’ll quickly learn it’s not ideal – SOLIDWORKS wasn’t made to edit STL files.
Magics on the other hand, was optimized for STL modifying. While arguably the best additive software for repairing or modifying STL files, what I really want to draw attention to is Magics’ autonomy.
Materialise, the developer of Magics, is not a printer OEM. Rather, they are an independent software company whose products work across a variety of additive platforms. Think of Materialise like Switzerland – entirely neutral to everyone. (Note – GSC is a partner provider of Materialise Magics.)
HP 3D Printing Compatible
Because of this, Materialise creates auxiliary modules for its Magics software that are optimized for a diverse selection of additive platforms. One of these modules, the HP Build Processor, has been impressing me a lot lately.
3D Nester
The HP Build Processor brings even more to Magics’ already rich toolbox. One of my favorites, the 3D Nester, takes all manual work out of packing an HP build volume (also known as a bucket), and automatically nests parts in accordance to pre-selected operator criteria. See more on HP 3D Printing to help you visualize.
While this may seem quite simple, it’s not. When packing a bucket, an operator must pay close attention to the slice density of each layer, i.e, the ratio of surface area per layer to part material. The slice density should be roughly the same across all layers of the build to prevent part warping or build failure.
With the 3D Nester, parts are automatically nested for optimum slice density. What previously took an operator hours, now takes minutes. But as good as the 3D Nester is, no operation is perfect. So how can you check if 3D Nester did its job?
Check Slice Distribution
Enter Check Slice Distribution, or as I like to call it, my sanity check. Check Slice Distribution takes the packed bucket, analyzes it, and spits out a histogram of the Slice Density. An overall rectangular shaped histogram is good, while a horizontal mountain range is not. Immediately, an operator can tell if they’re one step closer to printing, or if they need to go back, change a few parameters, and rerun the 3D Nester. It’s important to note that while Check Slice Distribution and 3D Nester might be my favorite tools, they are just a few out of a slew of operations worth mentioning, including Detect Trapped Volumes, Collision Detection, and Build Risk Analysis.
Trapped Volume Detector & Collision Detection


These tools do pretty much what you expect. The Detect Trapped Volumes feature checks for any closed volumes where powder may get trapped, while Collision Detection probes for any colliding parts. Better to find out about trapped volumes or colliding parts during build prep, rather than after the build itself, no?
Sinter Box
Sinter Box allows you to cage parts together. But why cage parts? In the HP, it’s easy to lose small parts during post processing. Caging small pieces together makes keeping track of them easier – it’s like putting leashes on small children at the mall. Magics generates cages automatically. Just select your parts and generate.


Build Risk Analysis
Imagine a world in which every print succeeded and tales of failed builds were just scary stories told to naughty interns. Would you believe me if I told you a world like this could be yours? I sure hope not.
The reality is that builds will always fail, but the right tools – cough, cough, the Build Risk Analysis – can help mitigate costly failures. Build Risk Analysis generates a heat map over the nested parts, illuminating risky part geometry.

Now, a few of you might be reading this and think: this is all fine and dandy, but I’m pretty confident in my printing skills and I don’t need all this newfangled software. Let me see if I can change your mind.
Better tools give better ROI (cost of failed build, customer satisfaction, operator time etc.)
Build Failure is No Bueno
Build failures are not the greatest thing in the world. They’re costly and frustrating; sometimes, build failures render parts into scrap, while other times an operator must waste valuable man hours unpacking and preparing a failed build unit for the next job. This doesn’t even take into consideration the cost of machine time and lost operator wages, yet the repercussions go beyond pecuniary. Deadlines are missed as jobs are pushed back to accommodate for the failure, and customers are left agitated.
Clearly, build failures are expensive and problematic, but there is a solution: software.
Software to the Rescue
Software has the power to alleviate issues that could arise during the print process, preventing issues before it’s too late. A skilled operator who uses software in tandem to check their work will discover catastrophic mistakes before throwing the build on. No one is immune to human error, but having the right tools (build failure analysis, collision detection, etc.) can mitigate it. Considering the repercussions of build failure, it would be a disservice not to use all the tools available to prevent it.
Improved Non-Recurring Engineering (NRE) Costs
But software isn’t just handy for preventing failed builds, it can also lower Non-Recurring Engineering (NRE) costs as well. Complicated parts require more NRE – after all, it takes time to develop the processes and parameters required to correctly build a part. But, if thin wall detection and build simulation can cull revs and get you to production sooner, NRE is slashed.
Software can reduce the iterations needed to develop a successful build and cut costs while doing so.
Make Better Use of Operator Time
Manually preparing builds eats up your operator’s time. Operators can spend hours packing builds and preparing support structures alone. With the right software, however, prep time can be significantly reduced. If the operator spends less time prepping, that leaves them more time for post processing, machine prep, and lab cleanup.
Software: Unlock Your Machine’s Full Potential
Take a geometry that failed on every print attempt 5 years ago, and place it on the same machine today. You might be surprised to see it succeed.
Software has come a long way in the past few years, and is responsible for printing “impossible” prints. Latticing, better support generation, and slicing algorithms makes a real impact. As we see software advance, so will its role in part creation.
Have a question? We’re always available to talk over the phone at 262-790-1080, for you to leave a message or for you to submit a request – just contact us.
Share
Meet the Author

